No Light Required, No Plot Needed: Oyster Mushrooms From Café Coffee Waste
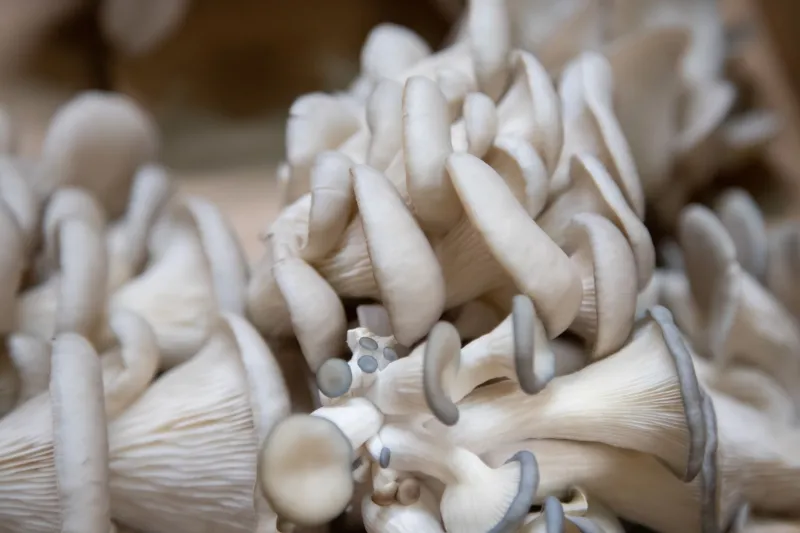
Winter is when the windowsill fills up with salads, herbs and the last of the chitting potatoes, and the plot gets quieter. Mushrooms are the obvious odd one out: they do not need a windowsill, a bed or even daylight to colonise. A bucket of spent coffee grounds in a dark cupboard can produce a few respectable flushes of oyster mushrooms between November and February, using a waste stream that most cafés are happy to hand over.
It is not quite as simple as tipping grounds into a tub and waiting. But it is close enough to be worth trying once, especially if you have a shed, an airing cupboard or a spare room corner that stays reasonably warm.
What you are actually signing up for
You are not growing a plant. You are giving a fungus a moist, pasteurised food source and a head start over moulds. The first stage is colonisation: white mycelium runs through the coffee grounds in the dark. The second is fruiting: tiny pins push out through holes in the bucket and become mushrooms.
That second stage is where the cupboard gets a little less dark. Oyster mushrooms do not photosynthesise, but they fruit better with some ambient light. A cupboard door opened daily, or a shed with a window, is more realistic than a pitch-black box. Colonisation can happen in the dark; fruiting wants a bit of daylight and, crucially, fresh air.
The realistic kit list
You do not need much, but you do need the right few things:
- A 5-litre bucket or similar food-grade tub with a lid. Drill bits or a hot skewer for 1–1.5cm holes around the sides.
- Oyster mushroom spawn from a reputable UK supplier. Grain spawn is easiest for coffee-ground buckets. Do not use mushrooms from the supermarket or forage your own spawn.
- Fresh spent coffee grounds. Plain, unflavoured grounds from a café or your own machine are ideal. Avoid grounds that have been sitting wet for days or have visible mould.
- A kettle, a lidded container for pasteurising, and a spray bottle.
- A clean plastic bag or loose lid to hold humidity, plus a thermometer if you like keeping notes.
- Gloves and a clean work surface. This is a food crop, so treat it like one.
Coffee grounds: free, but not any old grounds
Spent coffee is not sterile just because it has been brewed. Café grounds can carry mould spores and wild yeasts, and a bucket is a lovely warm home for both. The shortcut is to pasteurise the grounds before they go in.
The simplest method is to put the fresh grounds in a clean bucket, pour over enough boiling water to cover them, put the lid on and leave for an hour. Drain well and let them cool to room temperature before mixing with spawn. For small batches, a microwave works too: heat the damp grounds until steaming, then cover and cool. Do not use bleach or harsh chemicals, and do not skip the cooling step; heat will kill the spawn.
Ask a local café for grounds the same day they are produced. A small independent is usually glad to fill a bag. Use them within 24 hours if possible, and reject anything that smells sour or has fuzzy patches.
Building the bucket
Drill holes around the sides of the bucket, roughly at the level the coffee grounds will sit. These are the fruiting holes. Do not put holes in the base; you want the bucket to hold a little moisture, not leak all over the cupboard.
Layer cooled grounds and spawn in the bucket, aiming for roughly one part spawn to five to ten parts grounds by volume. Mix it through rather than leaving clumps. Put the lid on loosely, or cover the top with a clean plastic bag, and label it with the date. Keep it at around 20–24°C for colonisation. An airing cupboard is often too hot and too dry; a spare room or shed that stays above 15°C is better.
Leave it alone for two to four weeks. You are looking for a white, cottony bloom through the grounds. A faint mushroomy smell is normal. A sour or rotten smell is not.
Fruiting: humidity, airflow and a little light
Once the bucket is fully white, move it somewhere cooler: roughly 15–18°C. Open the cupboard door daily or move it to a shed with ambient light. Mist the inside of the bag or the cupboard walls, not the mushrooms directly. You want high humidity, around 85–90%, but not standing water.
Airflow is the bit most beginners miss. Oyster mushrooms grown in still, stuffy air produce long stems and tiny caps. Fan the space for a minute twice a day, or leave the cupboard door ajar with a draught-free gap. Pinheads should appear through the holes within a week or two. Harvest by twisting the whole cluster away from the bucket when the caps have curled slightly but before they flatten and drop spores.
What you will get, honestly
A 5-litre bucket is a small-scale crop. Expect roughly 300–600g of oyster mushrooms over two or three flushes, with the first flush usually the best. That is a couple of good meals, not a winter's supply. The whole cycle takes around six to ten weeks from mixing to final harvest, depending on temperature.
After the last flush, the spent substrate makes a decent addition to the compost heap. Do not try to keep the same bucket going indefinitely; contamination catches up with it.
Food safety and the mould question
Buy spawn from a reputable supplier and keep your hands, tools and tub clean. Cook oyster mushrooms thoroughly; do not eat them raw. If green mould appears, discard the whole bucket rather than trying to pick around it. Do not harvest mushrooms that are slimy, foul-smelling or growing from contaminated substrate. Anyone who is immunocompromised, pregnant or unsure should check with their GP before growing edible fungi at home, and nobody should eat a mushroom they cannot identify with certainty.
The cost per flush
A bag of oyster spawn costs roughly £8–12. A bucket is a couple of pounds, and coffee grounds are usually free. If you get 500g over two flushes from a £10 spawn bag, that is about £20 per kilogram, plus a little electricity and water. Supermarket oysters are often cheaper, so this is not a money-saving scheme in the narrow sense. It is a way to turn a waste stream into something fresh, to grow food without daylight, and to learn a process that fits a small flat or a dark shed.
Start with one bucket. Keep notes on temperature, timing and how much you mist. The second attempt is where the cupboard starts to earn its keep.